Desert Felted Play Mat Tutorial
Learn how to make a quick and easy desert felted play mat for small world play set ups. My DIY hack requires minimal materials and can be completed in no time! Whether you are teaching about different habitats, the Australian desert or just need to revamp your imaginative play area, this play mat will provide endless hours of fun and learning for your students.
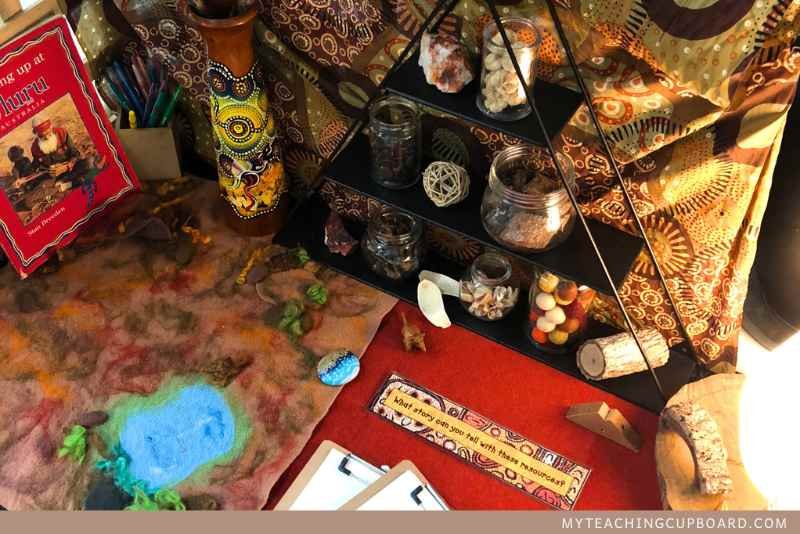
I needed a play mat as a base for a small world play setup. I was setting up a learning invitation to align to our upcoming Weather Unit. In this unit, we learn about how the weather affects our environment. Setting up a small world play area will encourage some investigations into our Australian Desert.
The aim is to explore how different climates, especially the Australian Desert, influence our surroundings.
The beauty of small world play is how it sparks curiosity and invites kids to develop story telling and explore their environment, this time with a weather twist.
I usually make wet felted play mats. You can read more about them and the process I use to make these gorgeous handmade play props here: How to Make a Wet Felted Play Mat
They're not only beautiful but lend a tactile richness to any play space.
Admittedly, they do require a fair chunk of time to create, which is a bit tricky when you're short on it. (real teacher life insert hand up emoji) This is where my simple DIY hack comes into play, and I must say, I'm thrilled with the end result. So much so, that I'm keen to share with you just how I achieved this.
Ready to create the perfect backdrop for your small-world play?

No need to worry about crafting skills or complicated techniques – this tutorial is beginner-friendly. I'll guide you step-by-step through the process, making it easy even if you don't have a creative bone in your body!
Have a go – you’ll be so proud of yourself when you create this stunning desert play mat.
The Basics of Felted Play Mats
When I think about crafting a felting project, play mats for the kids are one of my favourites. They can be as elaborate or as simple as you like, and there's something wonderfully tactile about the felted texture that children just love.
Typically, I start with wool roving—the soft, carded fibres that haven't been spun into yarn yet. The colours are usually vibrant, and the texture is perfect for shaping into landscapes or whatever theme we are learning about.
There are two main techniques you can use to make felted mats.
Wet felting - with wet felting, you get your hands wet - literally! You lay out the wool, add warm water and soap, and then rub and roll the fibres until they mesh together into a sturdy fabric. It's quite the arm workout, but it is really relaxing!
Needle felting - On the other hand, needle felting is a dry method. You use a barbed needle to sculpt wool into three-dimensional figures or to add details to the play mat. It's meticulous work, but it results in some brilliant textures and shapes that really bring the mat to life.
Making your own play mat gives you full creative control over the design, and it can even be a sustainable choice—if you source materials responsibly. There's no end to the themes you can create, from lush green landscapes to mystical fantasy worlds. And when you see the way the kids play on something you've crafted with your own two hands, well, it's just about the best feeling ever.
Benefits of Using a Felted Play Mat for Small World Play
When I'm setting up for small world play, the right play mat makes all the difference. It's all about creating an environment that's both educational and engaging.
Using a felted play mat for small world play offers numerous benefits for children's development. A felted play mat is calming and engaging and it does wonders for a child's imagination.
These play mats provide a soft and durable surface that enhances sensory experiences. The softness of felt is so pleasing to touch. It’s a lovely medium for sensory play. Children get to feel the contours and textures, which is great for their tactile development and encourages imaginative play. The texture of the felt stimulates soft tactile exploration and also lets children manipulate small world objects safely and quietly.
I love the calm it brings to investigation time. Natural wool play mats are therapeutic and create a quiet surface for play. There's something calming about natural fibres like pure wool. They are tranquil and soothing. It's like they've got a superpower that turns the volume down and helps kids focus on their play.
Playmats also help to define play spaces and create a visually appealing backdrop for storytelling and role-playing.
They are super easy to clean and maintain. Gently hand wash with a little detergent or wool wash and lie the gently squeezed mat out flat on a towel in the sun to dry.
Additionally, it can be customised to represent many different environments or themes. All you have to do is add a few props, like toy animals and plants, and your students will be able to explore living things and their habitats.
The desert-themed play mat we will be learning to create today is just one example of the endless possible habitats you can create. You can make a beach backdrop, grasslands, ponds, and oceans. These resources are perfect for small-world play.
Materials Needed for Making a Desert Felted Play Mat
To create your desert felted play mat, you will need the following materials:
A large piece of pure wool fabric in your base colour. I chose brown to represent the desert sand. Get a piece about a third bigger than the size you want your finished mat to be. You can use a ppiece of a pure wool blanket sourced from an op shop or you can purchase pure wool fabric from a fabric store. Get the thickest type you can. It is usually used to make clothing but we have something better in mind! A standard size for a play mat is around 90 cm or 36 inches by 60 cm or 24 inches, but you can adjust the dimensions to suit your needs.
A small piece of blue wool felt for the billabong or waterhole. You could also use the blue felt to make a creek or a pond.
A small piece of green wool felt to lay under the blue piece. This will create a grassy edge around the billabong. You could use a dark brown piece instead if you wanted it to represent mud.
A small piece of brown wool felt to make felt rocks. You could always leave these off your mat and use real rocks instead.
A few small balls of wool yarn in desert colours. Get balls like those used for knitting. The thicker the ply, the better. This will be used to add swirls of colour, small wildflowers and to make clumps of grass and little bushes. You could use Wool Roving instead but it is more difficult to source. Wool roving is unspun wool that you can shape and felt. It comes in many colours. If you do use rovings, you'll still need a ball of green pure wool to make clumps of grass.
Felting needles. (affiliate link) The process of felting itself requires some specialised tools. Felting needles are a must-have. They are special needles with barbs along the shaft. They tangle the wool fibres as you poke into them. You’ll use them to stab through the wool. The barbs catch on the wool fibres and push them together, which is called felting.
A felting mat (another affiliate link). I like to use a really thick piece of high-density foam. It makes a great DIY felting mat. A felting Mat provides a surface to work on and protects the needles from breaking. It also acts as a base to work on and protects your table and needles.
Scissors
A bar of pure soap and a grater, or purchase a box of Lux flakes from the fabric washing aisle at the supermarket. Lux flakes are pre-flaked soap flakes and are definitely worth getting if you plan on doing future felting projects. They are also used in wet felting.
Make sure all your wool is genuine pure wool. Anything synthetic won't do for a felting project. These materials are usually stocked at your local craft store or can be ordered online.

Now that you have your materials ready, let's get into the step-by-step process of creating your very own desert felt play mat. Remember, there's no right or wrong when it comes to your play mat's design.
Step-by-step Guide to Creating a Desert Felted Play Mat
Creating a desert-themed felted play mat is a rewarding DIY project. You can bring the Australian landscape to life by adding individual elements like a waterhole and a little cave using fine felting needles.
I'll guide you through the art of hand felting, ensuring your play mat is not only beautiful but also durable for imaginative play.
Felt The Base
First, we will start by felting your piece of pure wool fabric.
The one you chose for your base. Now I have a little cheat for this process. Put your fabric in a washing machine half fill it with the hottest water you can.
Add plenty of soap. You can grate about a quarter of a bar of soap into the water or use about half a cup of the Lux soap flakes. Turn your machine on for a full cycle. The hot water and soap will shrink and thicken your wool fabric. It’s a quick and easy way to felt a large piece of wool. I’m sure you have accidently felted your woollen clothes before (wink emoji)
Lay the thick mat out flat on a towel in the sun to dry. Turn the piece over after about an hour. You might need to replace the towel underneath if it is damp. You need your base to be really dry before you start adding all the details.
When your base is completely dry, you can start to add all the fun embellishments.
The Next Step is to Add Texture and Colour
Next, add some visual interest to your desert play mat by incorporating different shades of brown and beige. This will give your desert landscape a more textured and realistic appearance.
Cut short lengths of your wool yarn. About 6cm or 2 in pieces in the colours you’d like to decorate your base. I chose dark brown, red and black. Unravel the wool yarn so you have fibres and hand felt these randomly over the mat base. You don’t need to do the area where you plan to ad your waterhole, creek or pond.

How to Hand Felt using the Felting Needle
You'll need the foam pad or a felting mat on a sturdy surface for this part. Holding the felting needle in your dominant hand and the wool fibres in the other, you are ready to start the felting process.
Be careful with your fingers—felting needles are very sharp!
Start poking the wool with your needle, inserting it vertically into the fibers. The barbs on the needle will tangle the fibers and start to felt them together. Use gentle, consistent pokesand be patient. Take your time and enjoy the process.
Try to feel the wool to ensure a smooth texture without any loose bits. If I spot any stray fibres, a few more pokes or a gentle tug is all it takes to integrate or remove them.
Work your way over the fibres, continually poking as you go to ensure even felting.
As the wool begins to felt you will see it blend into the backing fabric. It will be quite smooth and not wispy. If you see any loose fibres, keep poking with the needle to felt them in or just pull them off.
Continue this way all over the base mat. Add new colours and experiment with layering. Once satisfied with the overall coverage, you can give the entire piece a final once-over with the needle to smooth out any loose fibers.

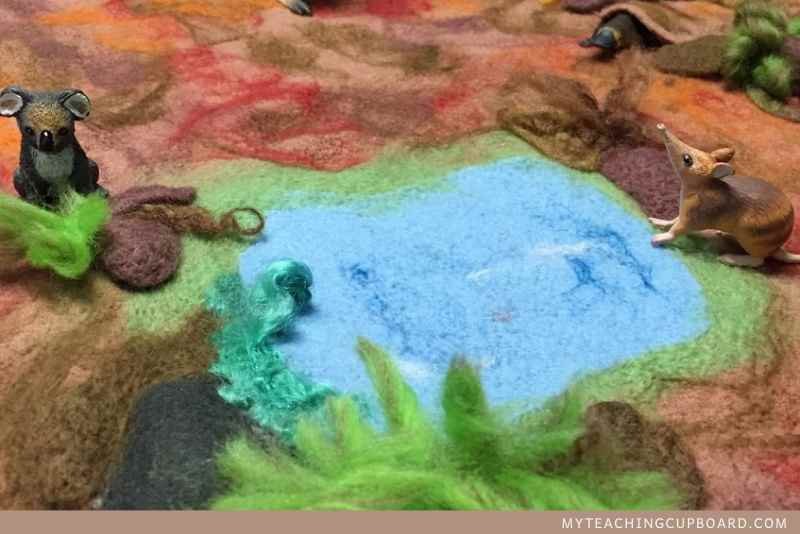
Now to Make a Waterhole
Once you have your base all done, it's time to create the desert landscape features. Lets start with a waterhole or creek. Creating a small oasis on your play mat by adding a blue felt pond or waterhole will invite your children to gather the toy desert animals around for a drink and encourages children to explore the concept of water scarcity in desert environments.
Cut the piece of blue felt to shape and lay it on your mat . Experiment with different positions until you find one you like. Don’t forget to leave room for a small cave if you think you might add this feature.
Before felting the blue piece to your base, lay it over the green (or brown) piece and cut it a little larger. You want the effect of that little muddy patch at the water's edge, so you need to match it to the blue-shaped piece.
Then place this green (or brown) piece on your base, and hand-felt it in a few spots just to make it stay in place. Hand felting works like glue. Lay the top blue piece on top and then hand felt all over through all three layers. This will take a while as you want all three layers to tangle and felt together.
Want to Create a Cave?
This might be difficult to do but you are going to have to cut into your base mat if you want to add a cave. Cut a piece from your mat at least 15 cm or 6in long and wide. Trim around the remaining base piece so it looks natural.
Position your piece where you'd like the cave to be. Make sure it is raised high enough for small toy animals to hide inside.
Hand felt around the outside edge of the cave to secure it to the base felt. You’ll be hand felting 3 of the edges to keep your cave in place.

Add Some Rocks
Take a piece of the brown felt and cut out irregular shapes to represent rocks. Cut to of each shape. Place each shape on the brown felt and cut around the edge so you have two pieces of felt that are the same. Join these by hand felting just around the edge, and make sure to leave an opening because you are going to stuff these rocks to make them raised. When finished felting around the edges, stuff small pieces of scrap felt and yarn into the opening to make your rocks 3D. Position your rocks on the base mat and we will secure each one separately by hand felting around the edges and even a few random pokes in the middle too. Don’t do too many pokes in the middle or you will flatten your rocks too much. This is a creative way to make ridges and more realistic rocks.
Keep hand felting ensuring you have completely closed up the opening and your rock is securely attached to the base.
Repeat until all the rocks are secured over the base mat.
The Finishing Touches
Finally, it is time to add the finishing touches. Let your creativity shine by adding wildflowers, clumps of grass and small bushes to your play mat.
I love using thick wool yarn to make bushes and grass clumps. It is super easy.
Cut lengths around 15cm or 6 in from the green wool. Place about six pieces together and fold them to find the rough center. Hand felt this center of the wool lengths to the base mat. Ensure all pieces are secure and then unravel each piece of yarn to make soft grass clumps. Trim them to a height that looks pleasing.
Now repeat this process but use shorter 5cm or 2 in pieces of yarn in the other colours. You can roll the yarn to make balls of wildflowers. Attach the balls by hand felting all over them.

3 Tips For Making a Realistic and Child-Friendly Play Mat
Texture and Layers: Build up layers and textures to give the mat a three-dimensional look. This will make it look more realistic.
Detailing: Small details like veins in leaves or gradations in flower colours can make a big difference in the final appearance.
Durability: Ensure that all pieces are securely attached. There’s nothing worse than having to refelt pieces that have fallen off or come loose after children have used the play mat.
Congratulations! You have successfully created your very own desert felted play mat. The next section will provide tips for designing and decorating your play mat to make it even more visually appealing and engaging for small world play.
Tips for Designing and Decorating Your Playscape Play Mat
Designing and decorating your playscape is an exciting opportunity to add your personal touches and make it truly yours. There’s nothing more satisfying than creating a unique, handmade learning resource.
Here are some tips to help you make the most out of your desert felted play mat:
Experiment with different shades and textures of felt fibres and yarns. You can even felt little cut out pieces of wool felt to make leaves and flowers. Use them to create depth and dimension. By using a variety of autumn tones in browns, beiges, reds and yellows, you can mimic the natural variations of a real Australian desert landscape.
Consider adding realistic elements like Australian wildflowers, flora like saltbush, spinifex grass or wattles to your play mat.
Creating a felt play mat themed around the Australian desert offers a wonderful opportunity to explore and represent some of the unique and resilient flora found in this harsh environment. Here are some iconic and realistic plants from the Australian desert that can be creatively made from felt:
Spinifex Grass: Spinifex has a distinctive circular, spiky form, appearing almost like a natural barbed wire. For a felt representation, use green and sandy-colored felt to create tufts. Cut strips of felt into thin, spiky lengths and bunch them together into dense clumps to replicate the grass’s spiky texture.
Desert Oak: This tree is characterized by a slender trunk with a sparse canopy, which becomes denser as the tree ages. Create the trunk from brown or grey felt, rolled and shaped into a cylinder. For the canopy, layer different shades of green felt cut into leafy shapes or fringed strips to give a textured effect.
Sturt's Desert Pea: Known for its striking red flowers with a black center, this plant is a vivid splash of color in the desert. Use red felt for the petals and black rolled balls for the center. The leaves are grey-green so cut felt into small, elongated shapes for a realistic look.
Acacia (Wattle): These bushes or small trees often have bright yellow, fluffy, ball-shaped flowers. Use bright yellow balls of felt to create small pom-poms or fluffy balls for the flowers. Green felt can be used for the leaves, which are typically small and needle-like.
Mulga: Mulga trees have a bushy appearance with grey-green, elongated leaves. Use grey-green felt to mimic the leaves, cutting them into fine, elongated pieces. For the branches, use darker felt, shaping them into twisted or forked forms.
Desert Bloodwood Tree: Known for its rough bark and blood-red sap, it features a broad canopy. Create the trunk and branches from dark brown or reddish-brown felt. For the canopy, use a mix of dark green and olive felts, cutting them into rounded shapes for the leaves.
This project not only brings a piece of the Australian desert into educational play but also introduces children to the unique biodiversity of different environments through tactile and visual exploration.
Remember, the design and decoration of your play mat should be tailored to your specific needs and preferences. Let your creativity guide you and have fun exploring different possibilities.
Tips for Success with Needle Felting
Patience is Key: Felting can be time-consuming, especially for detailed projects. Take your time and enjoy the process.
Safety First: Use a finger guard to protect your fingers from accidental pokes, as the needles are very sharp. Believe me – I know from personal experience!
Experiment: Play around with different shapes and layers. Felting is very forgiving; if you make a mistake, you can usually add more wool and re-felt.
Needle felting is a versatile craft that can be adapted to make everything from simple flat shapes to intricate three-dimensional figures. It’s perfect for creating unique decorations and educational resources for your play based learning invitations.

Enhancing Small World Play with Desert-themed Toys and Accessories
Now that you have created your desert felted play mat, it's time to bring it to life with desert-themed small toys and accessories. Here are some ideas to enhance your small-world learning provocation:
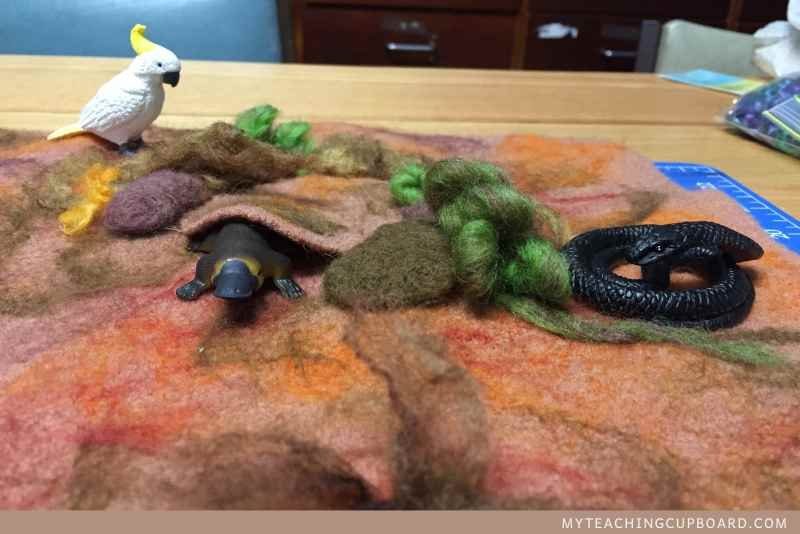
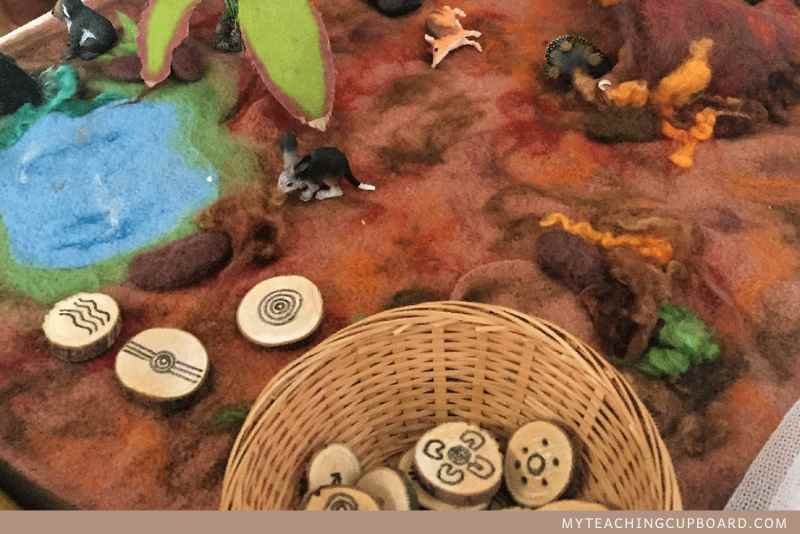
Small Animals: Include a variety of small desert animal figurines like kangaroos, bilbies, thorny lizards, brown and black snakes, scorpions, and emus and echidnas. I have a lovely set of Australian wooden animals that pair beautifully with the natural materials of the wool mat. Wooden toys and pure natural wool seem to go hand-in-hand. The plastic toy animals are still fine. Any little animals to help children learn about different animals that inhabit desert environments and encourage imaginative play.
Miniature vehicles: Add miniature vehicles like jeeps or trucks to your play mat. Children can use these vehicles to navigate through the desert landscape, simulating real-life desert exploration.
Desert plants and trees: Incorporate miniature desert plants and trees, such as little cacti or trees, to create a more realistic play environment. I find the reptile section at the pet shop has some great lifelike mini plants suitable for small world play. People use them to decorate their reptile tanks. You can even find some at the discount stores. Of course, if you have got the felting ug, make your own from wool felt. You can really make anything out of wool felt and felting. Additions like these will help children understand the unique flora found in desert ecosystems.
Desert landmarks: Include miniature replicas of well-known Australian desert landmarks like :
Uluru: Uluru is one of Australia's most recognisable natural landmarks. This massive sandstone monolith in the heart of the Northern Territory's arid Red Centre is sacred to indigenous Australians and is often visited for its natural beauty and cultural significance.
Kata Tjuta (The Olgas): Close to Uluru, Kata Tjuta is a group of large, ancient rock formations. The site includes 36 domes spread over more than 20 kilometers, offering a stunning landscape that complements the iconic Uluru.
Kings Canyon: Located in Watarrka National Park, Kings Canyon features ancient sandstone walls, rock holes, and gorges. The dramatic cliffs and ledges are an impressive representation of desert geography.
Purnululu National Park (The Bungle Bungles): Although more tropical, the Bungle Bungles are well-known for their distinctive beehive-striped domes. These formations, made from sandstone and conglomerates, have been eroded over millions of years and are a spectacular sight in the Kimberley region.
Lake Eyre: Known for being the largest salt lake in Australia and one of the lowest points below sea level in the world when filled, Lake Eyre is in the desert and mostly remains dry, filling only a few times each century.
The Painted Desert: Located in South Australia, the Painted Desert is famous for its colorful hills that have been naturally painted in different hues due to the weathering of the rocks over millions of years. It provides a fantastic opportunity to discuss geological processes with children.
Coober Pedy: Known as the "opal capital of the world," Coober Pedy is a mining town famous not only for its opals but also for its unique underground residences designed to escape the desert heat. Miniature mines or representations of the dug-out homes could be interesting features.
Devils Marbles (Karlu Karlu): The Devils Marbles are giant rounded granite boulders, precariously balanced on top of one another. Located in the Northern Territory, these formations are a striking sight and hold great cultural significance for the traditional owners.
Simpson Desert Dunes: Representing the rolling sand dunes of the Simpson Desert, famous for its red sand, could be visually striking. It's known for containing the world's longest parallel sand dunes.
MacDonnell Ranges: This series of mountain ranges is an essential part of Central Australia's landscape, featuring gaps, gorges, and unique flora and fauna. Sites like the Simpsons Gap and Glen Helen Gorge are particularly noteworthy.

With a little imagination, you can create these landmarks in miniature. I will sometimes drape the mat over some added 3D foundations made from wooden blocks borrowed from the blocks area. You can create hills and valleys and all different types of landforms.
Add a couple of related books or an atlas, and your play mat can provide an authentic and educational exploration of Australia's desert environment.
You can give children a glimpse into the diverse and spectacular geography of the region. This type of learning provocation not only develops geographic awareness, but also sparks curiosity about Australia's natural heritage and the cultural significance.

Other Creative Ideas for Felted Play Mats
While we have focused on creating a desert-themed play mat in this blog post, it's important to note that the possibilities for felted play mats are endless. Here are a few other creative ideas to inspire you:
Ocean-themed play mat: Use shades of blue felt to create an underwater landscape complete with waves, coral reefs, and sea creatures.
Forest-themed play mat: Combine different shades of green felt to represent a lush forest habitat, complete with trees, animals, and a winding river.
Arctic-themed play mat: Use white and light blue felt to create a snowy landscape with polar bears, penguins, and icy caves.
City-themed play mat: Incorporate felt buildings, roads, and vehicles to create a mini cityscape for imaginative play.
Feel free to experiment with different themes and designs to suit your educational goals or children's interests. Felted play mats provide endless opportunities for creativity and learning.

Cleaning and Maintaining Your Felted Play Mat
To ensure your felted play mat stays in good condition for years to come, follow these cleaning and maintenance tips.
Spot cleaning: If there are any spills or stains on your play mat, gently blot the area with a damp cloth and mild wool wash soap. Avoid rubbing or scrubbing, as this may damage the felt fibers.
Regular maintenance: Vacuum your play mat regularly to remove any dust or debris. Use the open end of the vacuum cleaner but not the brush attachment to avoid damaging the felt.
Storage: When not in use, store your play mat in a clean and dry area. Roll it up gently and secure it with a ribbon to prevent creases or wrinkles.
By following these simple cleaning and maintenance tips, you can ensure your desert felted play mat remains in excellent condition and continues to provide endless hours of play and learning.
Conclusion and Final Thoughts
In this blog post, we have explored the process of creating a quick and easy desert felted play mat for small world play. We discussed the benefits of using a felted play mat, provided a step-by-step guide for creating your own, and offered tips for designing and decorating your play mat. We also explored the different ways you can enhance small world play with desert-themed toys and accessories.
Felted play mats are a valuable tool for educators and parents alike, providing a platform for imaginative play, sensory exploration, and hours of storytelling. Whether you choose to create a desert-themed play mat or explore other themes, the process of making a play mat is a rewarding and enjoyable experience.
It's difficult not to be super critical of the things we make ourselves. Making the play mat or any wet felting materials is a process of letting go and accepting. Embrace the imperfections that come with handmade items. Children are unlikely to scrutinise your work for minor flaws. The magic for them lies in the play opportunities that your creation provides so experiment with various designs and accessories. Afterall, the ultimate goal is to enrich the play experience, not achieve perfection.
I find supplementing the desert landscape with relevant printables and activities from my store can further enhance your child's engagement and understanding of different habitats and the creatures that call them home.

So, if you're keen to extend your student’s learning journey, head to my store. You'll discover practical and purposeful play-based resources to bring your study of living things, the weather, and habitats to life.
Your desert felted play mat is just the beginning!